
Want to control your home lights wirelessly using just your phone’s web browser? This guide provides an easy, cost-effective, and beginner-friendly method to implement Wi-Fi home automation using the ESP32 microcontroller and a relay module. No proprietary apps, complicated hubs, or cloud services needed—just your local Wi-Fi network or even a mobile hotspot!
Why Choose ESP32 for WiFi Control?
The ESP32 is a powerful, low-cost micro-controller with built-in Wi-Fi, making it the perfect brain for IoT (Internet of Things) projects. By turning the ESP32 into a small web server, we can create a simple, browser-based interface accessible by any device connected to the same network—your smartphone, tablet, or PC.
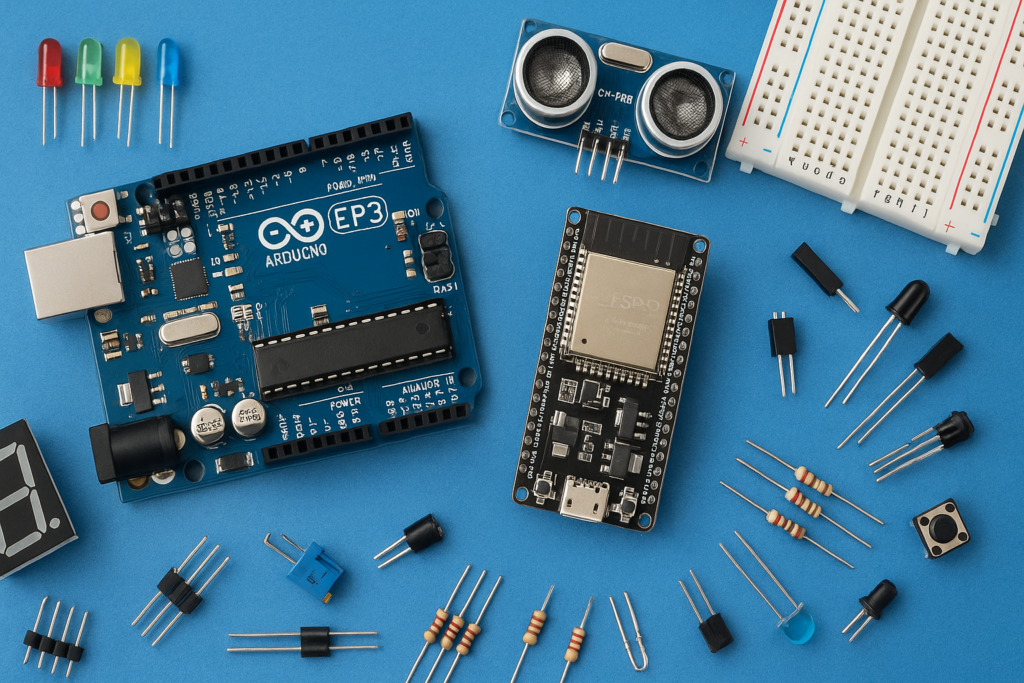
Components Needed
- ESP32 Development Board: https://amzn.to/437V6aN
- 5V Relay Module: https://amzn.to/3WxWsru
- AC Plug and Light Bulb Holder: https://amzn.to/4ofXWmi
- Connecting Wires https://amzn.to/47WBjN9
- A Computer with Arduino IDE
Step-by-Step Implementation Guide
1: Setting up the ESP32 Web Server
The first step is to program the ESP32 to connect to your Wi-Fi and host a simple “ON/OFF” web page.
- Prepare the Code: Connect your ESP32 to your computer and open the Arduino IDE. You will need to upload the web server code to the board.
- Customize Credentials: Before uploading, make sure to update the code with your local Wi-Fi network name (SSID) and password.
- Upload and Test: Once uploaded, open the Serial Monitor. The ESP32 will attempt to connect to the Wi-Fi. Upon successful connection, a server address (IP address) will be displayed.
- Browser Check: Open any web browser on a device connected to the same network and type in the server address. When you click the ‘ON’ button on the web page, the small built-in LED on the ESP32 board should light up, confirming the server is working correctly.
2: Wiring the High-Voltage Relay
This phase requires caution, as you are working with AC current. Always disconnect power before handling any wires.
- Connecting the Relay to ESP32:
- Connect the Relay’s Positive pin to the 3.3V pin of the ESP32.
- Connect the Relay’s Ground pin to the Ground pin of the ESP32.
- Connect the Relay’s Signal pin to the D2 pin of the ESP32.
- Wiring the AC Light: The relay acts as a switch, interrupting the flow of power to the light.
- Take your AC plug wire, which is connected to the bulb holder. Carefully cut only one of the two wires in the middle.
- Connect one cut end of the wire to the Common Terminal (COM) of the relay (the middle terminal).
- Connect the other cut end of the wire to the Normally Open (NO) pin of the relay.
3: Wireless Control
- Power Up: Connect the ESP32 to its 5V power supply and then plug in the AC bulb wire.
- Control: Now, open the server address on your phone’s browser. You can now reliably turn the AC light on and off wirelessly using your home Wi-Fi network or a mobile hotspot!.
Code:
#include <WiFi.h>

#include <WebServer.h>


// WiFi credentials

const char* ssid = "YOUR WIFI NAME";

const char* password = "YOUR WIFI PASSWORD";


// LED pin - using built-in LED on most ESP32 boards

const int ledPin = 2;


// Create web server on port 80

WebServer server(80);


// HTML page with ON/OFF buttons

const char webpage[] PROGMEM = R"=====(

<!DOCTYPE html>

<html>

<head>

    <meta name="viewport" content="width=device-width, initial-scale=1.0">

    <title>ESP32 LED Control</title>

    <style>

        body {

            font-family: Arial, sans-serif;

            text-align: center;

            background: linear-gradient(135deg, #667eea 0%, #764ba2 100%);

            margin: 0;

            padding: 20px;

            min-height: 100vh;

            display: flex;

            flex-direction: column;

            justify-content: center;

            align-items: center;

        }

        .container {

            background: white;

            padding: 40px;

            border-radius: 20px;

            box-shadow: 0 10px 40px rgba(0,0,0,0.3);

            max-width: 400px;

            width: 100%;

        }

        h1 {

            color: #333;

            margin-bottom: 30px;

            font-size: 28px;

        }

        .status {

            font-size: 20px;

            margin: 20px 0;

            padding: 15px;

            border-radius: 10px;

            font-weight: bold;

        }

        .status.on {

            background: #d4edda;

            color: #155724;

        }

        .status.off {

            background: #f8d7da;

            color: #721c24;

        }

        button {

            font-size: 24px;

            padding: 20px 40px;

            margin: 15px;

            border: none;

            border-radius: 12px;

            cursor: pointer;

            font-weight: bold;

            transition: all 0.3s;

            width: 200px;

            box-shadow: 0 4px 15px rgba(0,0,0,0.2);

        }

        .btn-on {

            background: #28a745;

            color: white;

        }

        .btn-on:hover {

            background: #218838;

            transform: translateY(-2px);

            box-shadow: 0 6px 20px rgba(40,167,69,0.4);

        }

        .btn-off {

            background: #dc3545;

            color: white;

        }

        .btn-off:hover {

            background: #c82333;

            transform: translateY(-2px);

            box-shadow: 0 6px 20px rgba(220,53,69,0.4);

        }

        button:active {

            transform: translateY(0);

        }

        .info {

            margin-top: 20px;

            color: #666;

            font-size: 14px;

        }

    </style>

</head>

<body>

    <div class="container">

        <h1>ESP32 LED Control</h1>

        <div class="status" id="status">Status: Unknown</div>

        <div>

            <button class="btn-on" onclick="ledControl('on')">LED ON</button>

            <button class="btn-off" onclick="ledControl('off')">LED OFF</button>

        </div>

        <div class="info">Control LED connected to GPIO 2</div>

    </div>


    <script>

        function ledControl(state) {

            fetch('/' + state)

                .then(response => response.text())

                .then(data => {

                    updateStatus(state);

                })

                .catch(error => {

                    alert('Error: Could not connect to ESP32');

                });

        }


        function updateStatus(state) {

            const statusDiv = document.getElementById('status');

            if(state === 'on') {

                statusDiv.textContent = 'Status: LED is ON';

                statusDiv.className = 'status on';

            } else {

                statusDiv.textContent = 'Status: LED is OFF';

                statusDiv.className = 'status off';

            }

        }


        // Get initial status

        fetch('/status')

            .then(response => response.text())

            .then(data => {

                updateStatus(data);

            });

    </script>

</body>

</html>

)=====";


void handleRoot() {

    server.send(200, "text/html", webpage);

}


void handleLEDon() {

    digitalWrite(ledPin, HIGH);

    server.send(200, "text/plain", "LED is ON");

    Serial.println("LED turned ON");

}


void handleLEDoff() {

    digitalWrite(ledPin, LOW);

    server.send(200, "text/plain", "LED is OFF");

    Serial.println("LED turned OFF");

}


void handleStatus() {

    String status = digitalRead(ledPin) ? "on" : "off";

    server.send(200, "text/plain", status);

}


void setup() {

    Serial.begin(115200);


    // Configure LED pin

    pinMode(ledPin, OUTPUT);

    digitalWrite(ledPin, LOW);


    // Connect to WiFi

    Serial.println();

    Serial.print("Connecting to ");

    Serial.println(ssid);


    WiFi.begin(ssid, password);


    while (WiFi.status() != WL_CONNECTED) {

        delay(500);

        Serial.print(".");

    }


    Serial.println();

    Serial.println("WiFi connected!");

    Serial.print("IP address: ");

    Serial.println(WiFi.localIP());


    // Setup web server routes

    server.on("/", handleRoot);

    server.on("/on", handleLEDon);

    server.on("/off", handleLEDoff);

    server.on("/status", handleStatus);


    server.begin();

    Serial.println("HTTP server started");

    Serial.print("Open http://");

    Serial.print(WiFi.localIP());

    Serial.println(" in your browser");

}


void loop() {

    server.handleClient();

}
Watch the full video tutorial here: http://www.youtube.com/watch?v=bjE903aLE6s